How to repair a failed lead inspection area – Lead inspection areas are crucial for ensuring the safety of buildings and their occupants. When these areas fail, it’s essential to address the issue promptly and effectively. This guide delves into the process of repairing a failed lead inspection area, covering everything from identifying the cause of failure to testing and inspecting the repaired area.
We’ll explore the different repair methods, safety precautions, and maintenance practices to ensure a successful and long-lasting repair.
Understanding the root cause of failure is paramount. This involves identifying common causes like improper installation, environmental factors, or material degradation. Thorough inspection and documentation are vital for pinpointing the issue and developing an effective repair plan. Once the cause is identified, we can proceed with the repair process, which includes preparing the work area, selecting the appropriate repair method, and implementing the repair steps in a safe and organized manner.
Identifying the Cause of Failure: How To Repair A Failed Lead Inspection Area
So, your lead inspection area has thrown in the towel. It’s time to play detective and figure out why this vital part of your system decided to call it quits. It’s like a car breaking down; you need to find the root of the problem before you can fix it.
Common Causes of Failure
Lead inspection areas can fail for a variety of reasons, but some culprits are more common than others. It’s like a crime scene; you need to look for clues to pinpoint the cause of the failure.
- Improper Installation:Think of it as building a house; if the foundation is weak, the whole structure is at risk. A poorly installed lead inspection area can lead to leaks, corrosion, and ultimately, failure.
- Environmental Factors:Mother Nature can be a tough adversary. Exposure to extreme temperatures, humidity, and even UV rays can take a toll on the materials, leading to degradation and failure.
- Material Degradation:Just like anything else, materials age and wear down. Over time, the materials used in a lead inspection area can become brittle, corroded, or simply lose their structural integrity.
Signs and Symptoms of a Failed Lead Inspection Area
A failing lead inspection area might not shout out its problems, but it does send out signals. These signals are like red flags, warning you that something is wrong.
- Leaks:This is a big one. If you see water leaking from the lead inspection area, it’s a clear sign of a problem. It’s like a faucet that’s constantly dripping; it’s a waste of resources and can lead to bigger issues.
- Corrosion:This is like rust on a car. Corrosion can weaken the materials and make the lead inspection area more prone to failure. It’s like a slow decay, eating away at the structure.
- Cracks or Deformations:If you see cracks or deformations in the lead inspection area, it’s a sign that the materials are under stress. It’s like a hairline fracture in a bone; it’s a warning sign that something needs to be addressed.
- Unusual Sounds:Sometimes, a failing lead inspection area will make unusual sounds, like creaking, groaning, or rattling. It’s like a car engine that’s starting to sputter; it’s a sign that something is not right.
Importance of Thorough Inspection and Documentation
To find the root cause of a failed lead inspection area, you need to conduct a thorough investigation. It’s like a detective piecing together clues to solve a case. A detailed inspection and documentation are essential for pinpointing the problem and preventing it from happening again.
- Visual Inspection:A thorough visual inspection can reveal a lot about the condition of the lead inspection area. It’s like looking for clues at a crime scene; you need to examine every detail.
- Testing:Sometimes, a visual inspection isn’t enough. Testing, such as pressure testing or leak detection, can provide more concrete evidence of the problem. It’s like using forensic evidence to solve a case; it can provide definitive proof.
- Documentation:Documenting the inspection findings is crucial. It’s like keeping a record of the evidence; it allows you to track the progress of the repair and prevent future problems.
Preparation and Safety

Before diving headfirst into the repair process, it’s crucial to get your ducks in a row. Think of it like prepping for a big gameyou need the right gear, the right strategy, and a clear game plan to avoid any unexpected penalties (or worse, injuries!).
So, let’s break down the essential steps for a safe and successful repair.
Preparing the Work Area
A well-organized workspace is your secret weapon for a smooth repair. It’s all about minimizing distractions and maximizing efficiency. Here’s a checklist to get you started:
- Clear the Area:Move any unnecessary items out of the way. You don’t want to trip over a stray wrench or accidentally knock over a bucket of paint.
- Provide Adequate Lighting:Good lighting is essential for visibility. Use a strong work lamp or ensure the room’s lighting is bright enough. You don’t want to miss any crucial details.
- Have a Designated Work Surface:A stable and clean work surface is a must. A workbench, table, or even a sturdy piece of plywood on sawhorses will do the trick.
- Organize Your Tools:Keep your tools organized and within easy reach. This will save you time and frustration during the repair process.
Personal Protective Equipment (PPE)
Think of PPE as your armor. It’s designed to protect you from potential hazards like electrical shocks, chemical burns, and flying debris. Here’s a rundown of essential PPE:
- Safety Glasses:Protect your eyes from flying debris, sparks, and chemicals.
- Gloves:Protect your hands from cuts, abrasions, and chemical exposure. Choose gloves appropriate for the materials you’ll be working with.
- Hearing Protection:Protect your ears from loud noises generated by tools or machinery. Earmuffs or earplugs will do the trick.
- Respirator:Protect your lungs from dust, fumes, and vapors. Choose a respirator appropriate for the specific hazards you’re working with.
Safety Best Practices
Safety should always be your top priority. Here are some best practices to keep in mind:
- Read the Manual:Before you start, familiarize yourself with the manufacturer’s instructions and safety warnings.
- Never Work Alone:It’s always a good idea to have someone else nearby in case of an emergency.
- Use Proper Tools:Use the right tools for the job. Improper tools can be dangerous and lead to accidents.
- Be Aware of Electrical Hazards:Always disconnect power before working on any electrical components.
- Don’t Rush:Take your time and work carefully. Rushing can lead to mistakes and accidents.
- Keep a First-Aid Kit Handy:Just in case!
“Safety is no accident. It’s a result of hard work, attention to detail, and a commitment to excellence.”
Repair Procedures
Now that we’ve identified the cause of the lead inspection area failure and taken the necessary safety precautions, it’s time to get down to business and fix the problem! This section will guide you through the various repair methods available, each with its own unique approach and benefits.
Patching
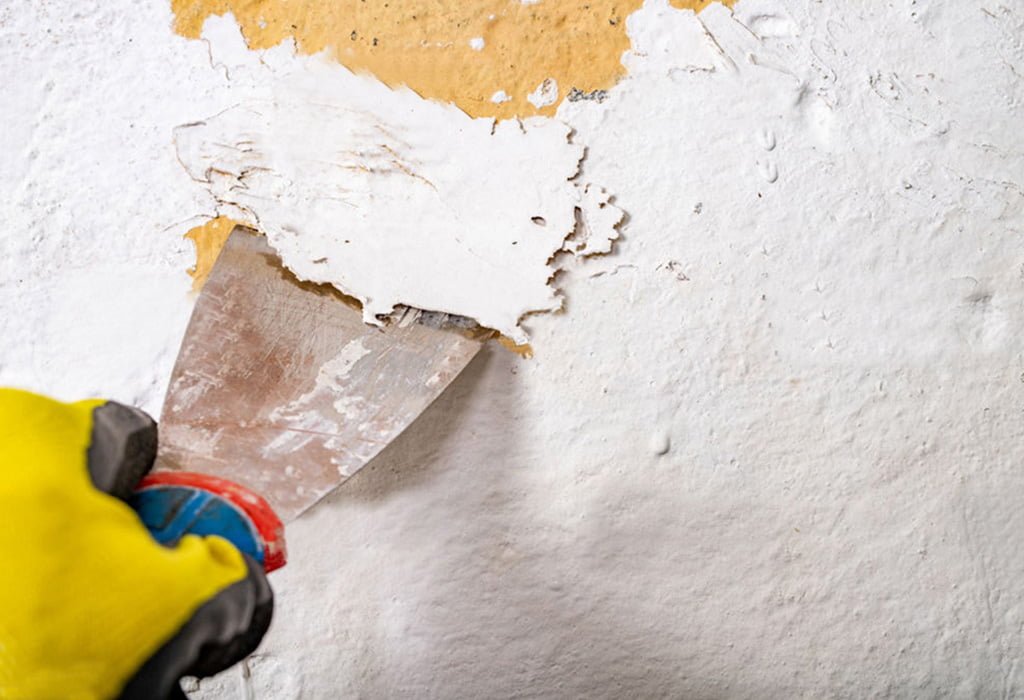
Patching is a common repair method for smaller lead inspection area failures. This technique involves filling in the damaged area with a lead-based patching compound.
- Prepare the area:Start by cleaning the damaged area thoroughly, removing any loose or damaged lead. This ensures a clean surface for the patching compound to adhere to.
- Apply the patching compound:Using a putty knife or a similar tool, apply the patching compound to the damaged area, ensuring it’s smooth and level with the surrounding lead.
- Smooth and finish:Once the patching compound has dried, use sandpaper to smooth out any rough edges and create a seamless transition with the surrounding lead.
Replacement
For larger failures or areas where the lead has become severely compromised, replacement is the preferred method. This involves removing the damaged section and replacing it with a new piece of lead.
- Remove the damaged section:Using a saw or a specialized lead cutting tool, carefully remove the damaged section of lead, ensuring a clean and even cut.
- Prepare the new lead:Measure and cut a new piece of lead to fit the opening created by the removal. Ensure the new lead is the same thickness and material as the original lead.
- Install the new lead:Secure the new lead in place using lead solder or a specialized lead adhesive. Ensure the new lead is flush with the surrounding lead and that the joint is properly sealed.
Reinforcement
Sometimes, the lead inspection area may not be completely damaged but needs additional support to prevent further deterioration. In these cases, reinforcement techniques can be used to strengthen the existing lead.
- Apply lead sheeting:For areas that are susceptible to cracking or bending, applying lead sheeting over the existing lead can provide extra support. This involves securing a sheet of lead over the existing lead using lead solder or a specialized adhesive.
- Install lead straps:For areas that require extra structural support, lead straps can be used to reinforce the lead inspection area. These straps are typically made of lead and are secured to the existing lead using lead solder or a specialized adhesive.
Testing and Inspection
After meticulously repairing the failed lead inspection area, it’s time to put your handiwork to the test. Just like a chef tastes their creation before serving, you need to ensure your repair is up to snuff and ready for the real-world.
Testing Procedures
The key to a successful repair is to verify its effectiveness. Think of it as a stress test for your repair job. You want to make sure it can handle the pressure and perform as expected. Here’s how to do it:
- Visual Inspection:This is the first step and involves a thorough examination of the repaired area. Look for any cracks, gaps, or inconsistencies. Make sure the repair blends seamlessly with the surrounding area. It’s like inspecting a freshly painted wall – you want a smooth, even finish.
- Electrical Continuity Test:This is a crucial test to ensure the repaired area conducts electricity properly. Use a multimeter to measure the resistance across the repair. A low resistance indicates good electrical continuity. Think of it like checking the flow of traffic on a highway – you want a clear path with no bottlenecks.
- Leakage Test:If the repaired area involves a seal or gasket, conduct a leakage test to check for any leaks. This involves applying pressure to the area and observing for any leaks. Think of it like testing a leaky faucet – you want a tight seal with no drips.
- Functional Test:This test involves putting the repaired area through its paces. For example, if you repaired a switch, test it by turning it on and off. If you repaired a circuit, test it by running appliances. Think of it like a test drive for a repaired car – you want to make sure it runs smoothly and performs as expected.
Inspection Procedures, How to repair a failed lead inspection area
Now that you’ve tested the repair, it’s time to ensure it meets safety standards. This is where you put on your safety inspector hat and scrutinize the work. Here’s how to do it:
- Safety Standards Compliance:Make sure the repair meets all applicable safety standards. Refer to relevant codes and regulations to ensure your work is up to par. Think of it like a building inspector checking for structural integrity – you want to make sure the repair is safe and compliant.
- Documentation:Document all the testing and inspection procedures you’ve performed. This documentation serves as a record of your work and helps you troubleshoot any future problems. Think of it like keeping a logbook for your repair – it helps you track your progress and diagnose any issues.
Testing and Inspection Parameters
Here’s a table summarizing the different types of tests and their corresponding parameters:
| Test Type | Parameter | Expected Value |
|---|---|---|
| Visual Inspection | No cracks, gaps, or inconsistencies | Pass |
| Electrical Continuity Test | Resistance | Low resistance (typically less than 1 ohm) |
| Leakage Test | Leakage rate | No leakage |
| Functional Test | Functionality | As expected |
Maintenance and Prevention

Preventing future failures in your lead inspection area is like preventing a house fire: better to be safe than sorry! A little bit of proactive care goes a long way towards keeping your lead inspection area in top shape.
Regular Inspections and Documentation
Regular inspections are crucial for identifying potential issues early on and preventing them from becoming major problems. Think of it like a car checkup: regular maintenance keeps your vehicle running smoothly and prevents major breakdowns. Documenting these inspections provides a historical record that helps you track changes over time, identify trends, and make informed decisions about maintenance needs.
- Establish a regular inspection schedule, based on the frequency of use and the specific needs of your lead inspection area. This could be monthly, quarterly, or even annually.
- Use a standardized inspection checklist to ensure that all critical components are evaluated consistently.
- Document the findings of each inspection, including any repairs or maintenance performed.
- Keep a log of all inspection records and maintenance history in a central location for easy access.
Identifying Potential Issues Early On
Early detection is key! Catching small issues before they become major problems can save you a lot of time, money, and hassle.
- Pay attention to any unusual noises, vibrations, or leaks. These could be early warning signs of a developing problem.
- Inspect all components for signs of wear and tear, such as cracks, corrosion, or loose connections.
- Check for any changes in performance, such as a decrease in accuracy or an increase in operating time.
- If you notice any potential issues, address them promptly before they escalate.
Concluding Remarks
Repairing a failed lead inspection area requires a methodical approach that combines technical expertise with safety considerations. By following the steps Artikeld in this guide, you can ensure a successful repair that restores the integrity of the lead inspection area and protects the safety of the building and its occupants.
Remember, regular maintenance and preventative measures are essential for minimizing the risk of future failures. By implementing these practices, you can extend the lifespan of the lead inspection area and maintain a safe and healthy environment for everyone.
Common Queries
What are the common signs of a failed lead inspection area?
Cracks, peeling paint, discoloration, rust, or any visible damage to the lead inspection area can indicate failure.
What tools and equipment are needed for repairing a failed lead inspection area?
The necessary tools and equipment will vary depending on the repair method. However, common tools include a scraper, putty knife, sandpaper, paintbrushes, and safety gear like gloves and masks.
How often should I inspect my lead inspection areas?
Regular inspections, at least annually, are recommended to identify potential issues early on and prevent major problems.