How to Use Permatex Windshield Repair Kit: A cracked windshield can be a major inconvenience, impacting your safety and the overall appearance of your vehicle. While a professional repair is often the ideal solution, Permatex windshield repair kits offer a cost-effective alternative for addressing minor damage, such as small chips and cracks.
These kits provide a simple and straightforward way to restore the integrity of your windshield, often preventing the need for a full replacement.
Understanding the process of using a Permatex windshield repair kit is essential for achieving successful results. From preparing the damaged area to applying the resin and curing the repair, each step plays a crucial role in ensuring a durable and long-lasting fix.
This guide will walk you through the entire process, equipping you with the knowledge and confidence to tackle this common automotive repair.
Introduction to Permatex Windshield Repair Kits

Permatex windshield repair kits are designed to fix small chips and cracks in your windshield, preventing them from spreading and potentially saving you from a costly windshield replacement. These kits are specifically designed to address minor damage like:
Star-shaped cracks
These are the most common type of windshield damage and resemble a starburst pattern.
Bullseye cracks
These are circular cracks that often appear after a small impact.
Spiderweb cracks
These cracks resemble a spiderweb and can radiate outward from the impact point.
Pitted damage
This type of damage is caused by small debris hitting the windshield, leaving small pits or indentations.
Advantages of Using Permatex Windshield Repair Kits
Permatex windshield repair kits offer several advantages over professional repairs:* Cost-effectiveness:Using a Permatex windshield repair kit is significantly cheaper than having a professional repair the damage.
Convenience
You can repair the damage yourself at your convenience, eliminating the need to schedule an appointment with a professional.
Time-saving
The repair process is typically quick and straightforward, allowing you to get back on the road quickly.
Easy to use
Permatex kits come with clear instructions and all the necessary tools, making the repair process simple for anyone to follow.
Understanding the Kit Components

Knowing what’s inside the kit and how each component works is essential for a successful windshield repair. Let’s dive into the components of a typical Permatex windshield repair kit.
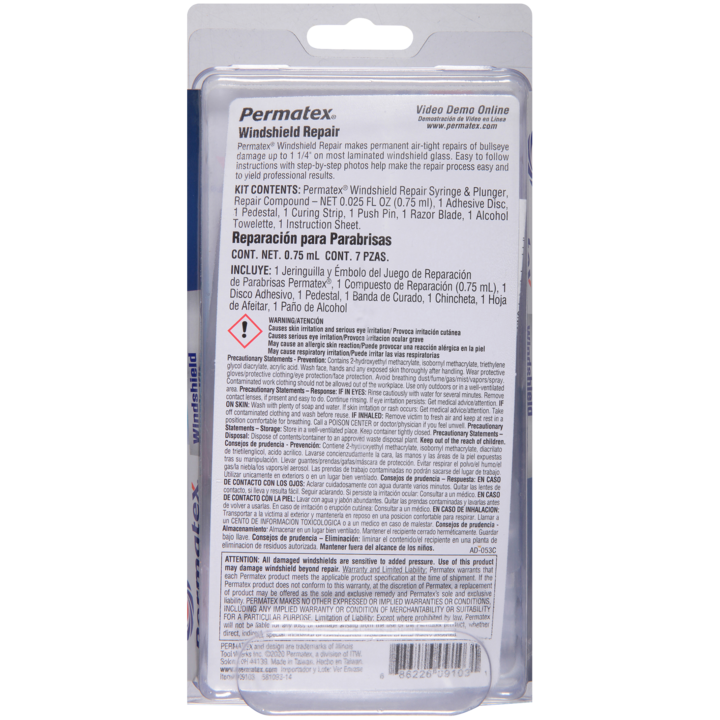
Components of a Permatex Windshield Repair Kit
Each Permatex windshield repair kit contains various components, each designed to play a specific role in the repair process.
- Resin: This is the core component of the repair process. The resin, often a clear, epoxy-based solution, fills the crack or chip, bonding the glass fragments together.
- Injection Tool: This tool is used to inject the resin into the crack or chip. It typically consists of a syringe-like device with a needle or applicator tip.
- Preparation Pads: These pads are used to clean the area around the crack or chip before applying the resin. They are usually impregnated with a cleaning solution to remove dirt, debris, and any loose glass fragments.
- Curing Light: This is an ultraviolet (UV) light source that accelerates the curing process of the resin. The curing light helps the resin harden and bond to the glass quickly.
- Razor Blade: A razor blade is included to help remove any excess resin or debris after the repair is complete.
- Instructions: Detailed instructions are provided to guide you through the repair process, ensuring proper usage of each component.
Component Functions and Uses
| Component | Function | Use |
|---|---|---|
| Resin | Fills the crack or chip, bonding the glass fragments together. | Injected into the crack or chip using the injection tool. |
| Injection Tool | Delivers the resin into the crack or chip. | Used to accurately inject the resin into the crack or chip. |
| Preparation Pads | Cleans the area around the crack or chip, removing dirt, debris, and loose glass fragments. | Used to thoroughly clean the area before applying the resin. |
| Curing Light | Accelerates the curing process of the resin, helping it harden and bond to the glass. | Used to shine UV light onto the repaired area, speeding up the hardening process. |
| Razor Blade | Removes any excess resin or debris after the repair is complete. | Used to carefully remove any excess resin that may have spilled or hardened outside the crack. |
| Instructions | Provides detailed instructions for the repair process, ensuring proper usage of each component. | Read and follow the instructions carefully to ensure a successful repair. |
Preparing for the Repair

Before you start, it’s important to set yourself up for success. Proper preparation is crucial for a successful windshield repair.
Safety Precautions
Windshield repair involves working with chemicals and sharp tools. It’s important to prioritize safety by following these guidelines:
- Always wear safety glasses to protect your eyes from flying debris or chemicals.
- Wear gloves to prevent skin contact with the adhesive and cleaning solutions.
- Ensure proper ventilation to avoid inhaling fumes from the adhesive or cleaning solutions.
- Keep children and pets away from the work area to prevent accidental contact with tools or chemicals.
Cleaning and Preparation
The success of your windshield repair depends on a clean and properly prepared surface.
- Clean the damaged area thoroughly with the provided cleaning solution, removing any dirt, debris, or loose glass fragments. Use a microfiber cloth for best results.
- Ensure the damaged area is completely dry before applying the adhesive. Any moisture can compromise the bond.
- If necessary, use a razor blade to carefully remove any remaining glass fragments, ensuring to scrape in one direction to avoid damaging the surrounding glass.
Lighting and Workspace
Adequate lighting is essential for accurate application of the adhesive and proper visibility of the damaged area.
- Work in a well-lit area, preferably with natural light. If using artificial light, ensure it’s bright enough to illuminate the work area without casting shadows.
- Set up your workspace on a stable and level surface. This ensures the adhesive is applied evenly and prevents spills.
Step-by-Step Repair Process: How To Use Permatex Windshield Repair Kit
This section provides a comprehensive guide to using the Permatex windshield repair kit, walking you through each step with clear instructions and visual descriptions. By following these steps, you can effectively repair small chips and cracks in your windshield and restore its structural integrity.
Preparing the Repair Area
Before you begin the repair process, it’s essential to prepare the repair area thoroughly. This ensures optimal adhesion and prevents contamination, ultimately leading to a successful repair.
- Clean the Damaged Area:Use a clean cloth and a mild detergent to remove dirt, debris, and any loose glass fragments from the damaged area. Ensure the area is completely dry before proceeding.
- Apply Masking Tape:Apply masking tape around the damaged area, leaving a margin of about 1 inch on all sides. This helps to contain the resin and prevents it from spreading beyond the repair area.
- Drill a Hole:Using a drill bit that is slightly smaller than the diameter of the crack or chip, drill a small hole at the end of the crack. This creates an entry point for the resin and helps to prevent the crack from spreading further.
Injecting the Resin
Once the repair area is prepared, you can start injecting the resin. This step is crucial as it fills the crack or chip and restores the windshield’s structural integrity.
- Prepare the Resin:Mix the resin and hardener according to the instructions provided in the kit. Use a clean mixing stick to ensure proper mixing and avoid contamination.
- Insert the Injector:Insert the tip of the injector into the drilled hole and carefully inject the resin into the crack or chip. Ensure the resin completely fills the damaged area.
- Remove Excess Resin:After injecting the resin, use a clean cloth to remove any excess resin that may have spilled onto the windshield.
Curing the Resin
After injecting the resin, you need to allow it to cure properly. This ensures the resin hardens and forms a strong bond with the windshield.
- Expose to Sunlight:Expose the repaired area to direct sunlight for the time specified in the kit’s instructions. Sunlight helps to cure the resin more effectively and ensures a strong bond.
- Avoid Exposure to Water:Avoid washing the repaired area for at least 24 hours after the resin has cured. Water can affect the curing process and weaken the bond.
- Remove Masking Tape:Once the resin has fully cured, carefully remove the masking tape from the windshield.
Final Touches, How to use permatex windshield repair kit
After the resin has cured, you can finish the repair by removing any excess resin and restoring the appearance of the windshield.
- Smooth Out the Resin:Use a razor blade or a scraper to carefully smooth out any excess resin that may have hardened on the windshield.
- Clean the Area:Use a clean cloth and a mild detergent to clean the repaired area and remove any residue from the resin or masking tape.
Post-Repair Care and Considerations

After you’ve successfully repaired your windshield using the Permatex kit, it’s crucial to understand the proper post-repair care to ensure the repair lasts and your windshield remains safe.
Curing Time
The resin used in windshield repair kits needs time to cure properly. This process involves hardening and bonding with the glass, ensuring the repair is strong and durable. The recommended curing time is typically 24 hours.
- During this time, avoid driving your vehicle or subjecting the repaired area to excessive heat or moisture.
- Heat can accelerate the curing process, but it’s essential to follow the manufacturer’s instructions regarding the appropriate temperature range.
- Excessive moisture can hinder the curing process and potentially compromise the repair.
Driving After Repair
Once the curing time is complete, you can start driving your vehicle. However, it’s important to be cautious during the initial few days.
- Avoid driving at high speeds or on rough roads, as these conditions can put additional stress on the repaired area.
- It’s recommended to drive at moderate speeds and avoid sudden braking or sharp turns for at least a week.
- This allows the resin to fully bond with the glass and strengthens the repair.
Limitations of Windshield Repair Kits
While windshield repair kits are effective for small cracks and chips, they have limitations.
- They are not suitable for large cracks or damage that extends to the edge of the windshield.
- Cracks that are older or have spiderwebbed are also difficult to repair effectively using a kit.
- If the damage is extensive, a professional windshield replacement is necessary.
Professional Repair
In situations where the damage is too severe for a DIY repair kit, seeking professional assistance is essential.
- A qualified auto glass technician can assess the damage and determine the best course of action.
- They have specialized tools and techniques to ensure a safe and durable repair or replacement.
- Remember, a compromised windshield can severely impact your safety and visibility while driving.
Concluding Remarks
By following these steps and taking the necessary precautions, you can successfully repair minor windshield damage using a Permatex windshield repair kit. Remember, while these kits are effective for small cracks and chips, they may not be suitable for larger or more complex damage.
Always consult with a professional if you have any doubts about the severity of the damage or the appropriate repair method.
Detailed FAQs
How long does the repair take?
The curing time for Permatex windshield repair kits varies depending on the specific product and environmental conditions. Typically, it takes around 24 hours for the resin to fully cure.
Can I drive after using the repair kit?
It’s generally recommended to avoid driving for at least 24 hours after applying the repair kit to allow the resin to fully cure.
What if the repair doesn’t work?
If the repair is unsuccessful, it’s best to consult with a professional for a more comprehensive repair solution.
How do I dispose of the leftover resin?
Check the product instructions for specific disposal guidelines. Generally, leftover resin should be disposed of according to local regulations for hazardous waste.