Why do bike tires lose air? It’s a question that plagues cyclists everywhere, turning a leisurely ride into a frustrating flat tire saga. The answer, like a punctured tire, has many layers. From the natural diffusion of air through rubber to the perils of punctures and valve stem mishaps, a multitude of factors can contribute to that dreaded deflation.
Imagine you’re cruising down a scenic trail, feeling the wind in your hair, when suddenly, your bike starts feeling wobbly. You pull over, and to your dismay, your tire is flat. You’re stranded, miles from home, with no way to inflate your tire. It’s a scenario that every cyclist dreads, and one that can be caused by a variety of factors.
In this article, we’ll explore the common culprits behind tire deflation, from the microscopic to the macroscopic, and offer solutions to keep your rides smooth and puncture-free.
Causes of Air Loss
Losing air from your bike tires is a common problem that can be frustrating, but understanding the causes can help you prevent it. Several factors contribute to air loss, and each has its own unique impact on how quickly your tires deflate.
Impact of Tire Pressure on Air Loss
The pressure inside your bike tires plays a crucial role in how quickly they lose air. Higher tire pressure means the air molecules are more tightly packed, reducing the likelihood of escaping through tiny pores in the rubber or around the valve stem. Lower pressure, on the other hand, creates more space for air molecules to move, making it easier for them to leak out.
This is why properly inflated tires tend to hold air for longer periods.
Punctures
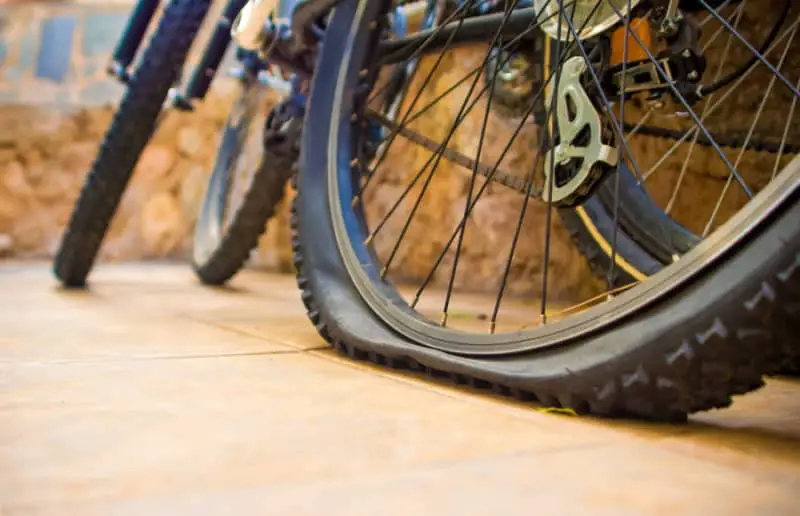
A puncture occurs when a sharp object penetrates the tire, creating a hole that allows air to escape. The severity of a puncture determines how quickly the tire deflates. Small punctures, such as those caused by thorns or small nails, might only result in a slow leak, while larger punctures can cause rapid deflation. It’s important to note that even small punctures can be dangerous, as they can lead to a sudden flat tire while riding.
Valve Stems
The valve stem is a critical component that connects the tire to the inflation device. It acts as a gateway for air to enter and exit the tire. Over time, the valve stem seal can wear down, leading to air loss. This can be caused by several factors, including:
- Improper valve stem installation: If the valve stem is not installed correctly, it might not create a tight seal, allowing air to escape.
- Damaged valve stem core: The valve stem core is a small piece inside the stem that controls the flow of air. If it’s damaged or worn out, it can leak air.
- Corrosion: Over time, the valve stem can corrode, particularly if exposed to moisture. This corrosion can weaken the seal and cause air loss.
- Valve stem cap: The valve stem cap helps protect the valve stem from dirt and debris. A missing or loose valve stem cap can allow dirt and moisture to enter the stem, leading to corrosion and air loss.
Natural Air Loss
Even with a perfectly sealed valve, a bike tire will gradually lose air over time due to a natural phenomenon known as diffusion. This occurs because air molecules are constantly in motion, and they have a tendency to move from areas of high concentration to areas of low concentration.
This means that air molecules inside the tire will gradually leak out through the rubber, especially if the tire is old or the rubber is damaged. This process is slow, but it can lead to a noticeable loss of air pressure over time, especially in hot weather or when the tire is exposed to direct sunlight.
Factors Influencing Air Loss Rate
The rate of natural air loss is influenced by several factors:
- Tire Material: The type of rubber used in the tire construction plays a significant role in air loss. Natural rubber, commonly used in older tires, tends to have a higher permeability to air than synthetic rubber. Modern tires often use synthetic rubber blends designed to minimize air loss.
- Tire Construction: The thickness and density of the tire rubber also affect air loss. Thicker and denser rubber will generally offer better resistance to air diffusion.
- Temperature: As temperature increases, the rate of air diffusion through rubber increases. This is because the molecules move faster at higher temperatures, leading to more frequent collisions with the rubber molecules and an increased likelihood of passing through.
- Tire Pressure: The pressure inside the tire also influences the rate of air loss. Higher pressure means more air molecules are packed into a smaller space, increasing the pressure gradient and driving the diffusion process.
- Tire Age: Over time, rubber deteriorates, becoming more porous and allowing air to escape more easily. This is why older tires tend to lose air more quickly.
Comparison of Tire Materials and Constructions
Here’s a general comparison of air loss rates for different tire materials and constructions:
| Tire Type | Air Loss Rate (Typical) | Comments |
|---|---|---|
| Natural Rubber (Older Tires) | High | More prone to air diffusion due to the inherent permeability of natural rubber. |
| Synthetic Rubber Blends (Modern Tires) | Low | Designed to minimize air diffusion through advanced polymer formulations. |
| Thicker Tires | Lower | Greater thickness provides more resistance to air diffusion. |
| Denser Tires | Lower | Denser rubber offers better resistance to air diffusion. |
Minimizing Natural Air Loss
While natural air loss is unavoidable, you can take steps to minimize it:
- Maintain Proper Tire Pressure: Ensure your tires are inflated to the manufacturer’s recommended pressure. This minimizes the pressure gradient and slows down the diffusion process.
- Inspect Tires Regularly: Look for any signs of damage, cracks, or punctures that could accelerate air loss.
- Store Tires Properly: When not in use, store tires in a cool, dry place, out of direct sunlight. This helps to prevent rubber deterioration and minimize air loss.
- Consider Tire Age: If your tires are several years old, it’s a good idea to consider replacing them, as they may be losing air more quickly due to rubber degradation.
External Factors

While natural air loss is an inevitable process, external factors can significantly accelerate the rate at which your bike tires lose air. Understanding these factors and taking preventive measures can help you maintain optimal tire pressure and ensure a smooth and safe ride.
Temperature Fluctuations
Temperature plays a crucial role in tire pressure. As temperature increases, air molecules inside the tire expand, leading to an increase in pressure. Conversely, when the temperature drops, air molecules contract, resulting in a decrease in pressure. This phenomenon is known as the “thermal expansion of gases.”
The relationship between temperature and pressure is directly proportional, meaning that for every 10°F (5.5°C) change in temperature, tire pressure changes by approximately 1 PSI (0.7 kPa). For instance, if your tire pressure is 30 PSI at 70°F (21°C), it will increase to about 31 PSI at 80°F (27°C) and decrease to about 29 PSI at 60°F (15°C).
Humidity and Altitude
Humidity and altitude can also impact tire pressure, although their effects are less pronounced than temperature fluctuations. Humidity, or the amount of moisture in the air, can slightly affect tire pressure by altering the density of air molecules. Higher humidity can lead to a slight increase in pressure, while lower humidity can result in a slight decrease.
Altitude, or the height above sea level, can also influence tire pressure. As altitude increases, atmospheric pressure decreases, leading to a slight reduction in tire pressure. This is because the air inside the tire is at a higher pressure than the surrounding air, and the difference in pressure becomes more pronounced at higher altitudes.
Storage Conditions
The way you store your bike can significantly impact tire pressure. If your bike is stored in extreme temperatures or exposed to direct sunlight, it can lead to rapid fluctuations in tire pressure. Ideally, store your bike in a cool, dry place, away from direct sunlight and extreme temperatures. Avoid storing your bike on a hard surface for extended periods, as it can cause the tire to deform and lose pressure.
Protecting Tires from Environmental Factors
To minimize the impact of environmental factors on tire pressure, consider the following:
- Check tire pressure regularly, especially before and after long rides, or when there are significant temperature changes.
- Use a high-quality tire sealant to help prevent slow leaks and seal punctures.
- Store your bike in a cool, dry place, away from direct sunlight and extreme temperatures.
- Avoid storing your bike on a hard surface for extended periods.
- Consider using a tire pressure gauge with a built-in thermometer to monitor both pressure and temperature.
Identifying the Cause
Once you’ve determined that your tire is losing air, the next step is to figure out why. This involves a combination of visual inspection, pressure checks, and testing for leaks.
Visual Inspection
A visual inspection can often reveal the source of the air loss. Look for:
- Punctures: These are small holes in the tire caused by sharp objects like nails, glass, or thorns. Look for any obvious punctures, including small holes or tears in the tire tread or sidewall.
- Cuts or Tears: Larger cuts or tears in the tire can also lead to air loss. Inspect the tire’s sidewall for any deep cuts or tears that could be letting air escape.
- Cracks or Dry Rot: Tires can develop cracks or dry rot over time, especially if they are exposed to extreme temperatures or weather conditions. These cracks can allow air to escape.
- Valve Stem Issues: Examine the valve stem, the metal part that connects to the tire, for any damage or leaks. This includes checking the valve core, the small metal piece that seals the valve stem, for any signs of wear or damage.
- Bead Seat Problems: The bead seat is the area where the tire rim meets the tire. Look for any signs of the tire bead being loose or damaged, as this can lead to air leakage.
Pressure Gauge
A pressure gauge is essential for accurately measuring the tire pressure and determining the rate of air loss.
- Check the Pressure: Use a pressure gauge to measure the tire pressure. Compare the reading to the recommended pressure for your tire, which can be found on the tire sidewall or in your vehicle’s owner’s manual.
- Monitor the Pressure: After inflating the tire, check the pressure again after a few hours. If the pressure has dropped significantly, this indicates a leak.
- Measure the Rate of Loss: To determine the rate of air loss, measure the tire pressure at two different times, for example, in the morning and in the evening. Calculate the difference in pressure to determine the rate of air loss.
Soapy Water Solution
A soapy water solution can help pinpoint the location of a leak, especially if it’s small and difficult to see.
- Mix the Solution: Combine a few drops of dish soap with water to create a soapy mixture.
- Apply the Solution: Apply the soapy water solution to the entire tire, including the valve stem, bead seat, and sidewall.
- Observe for Bubbles: Look for any bubbles forming. Bubbles indicate that air is escaping from that area.
Puncture Identification
The location and size of the puncture can provide clues about its cause:
- Tread Puncture: A puncture in the tire’s tread is likely caused by a sharp object, such as a nail or a piece of glass, that has been driven into the tire.
- Sidewall Puncture: A puncture in the sidewall of the tire is more serious and often requires a tire replacement. These punctures can be caused by sharp objects or by impact with a curb or other obstacles.
- Small Puncture: A small puncture, often caused by a tiny object like a staple or a thorn, may only result in a slow leak.
- Large Puncture: A large puncture, caused by a sharp object like a nail or a piece of glass, will result in a rapid loss of air.
Solutions and Prevention

Losing air from your bike tires is a common problem, but thankfully, there are various solutions and preventative measures you can take to keep your tires inflated and your rides smooth. These methods can range from simple patching to more advanced techniques like using tire sealant.
Patching a Puncture
A puncture in your tire is a common cause of air loss. Fortunately, patching a puncture is a relatively straightforward process that can be done at home with the right tools.
- First, you’ll need to identify the puncture. Look for any visible holes or tears in the tire. You can also use a soapy water solution to check for leaks; if bubbles appear, that’s where the puncture is.
- Once you’ve found the puncture, use a tire lever to pry the tire off the rim. This will allow you to access the inner tube.
- Locate the puncture in the inner tube and use sandpaper or a file to roughen the area around it. This will help the patch adhere properly.
- Apply a patch to the puncture, ensuring it’s centered and covers the hole completely.
- Use a tire iron to re-mount the tire onto the rim, making sure it’s seated properly.
- Inflate the tire to the recommended pressure.
It’s important to note that patches are temporary solutions and should be replaced periodically. If you notice repeated punctures in the same area, it might be a sign that the tire itself is damaged and needs to be replaced.
Replacing a Damaged Valve Stem
The valve stem is the part of the tire that allows you to inflate and deflate the tire. It can be damaged by a variety of factors, including punctures, corrosion, or simply wear and tear. If your valve stem is damaged, it will need to be replaced.
- First, you’ll need to remove the tire from the rim. This can be done using tire levers.
- Once the tire is off the rim, remove the old valve stem. This can be done by unscrewing it with a valve stem tool.
- Install the new valve stem, ensuring it’s properly seated in the rim.
- Re-mount the tire onto the rim and inflate it to the recommended pressure.
Replacing a valve stem is a relatively simple procedure, but it’s important to use the correct tools and techniques to ensure a proper installation.
Maintaining Proper Tire Pressure
Maintaining proper tire pressure is crucial for maximizing tire life, improving handling, and reducing rolling resistance. Under-inflation can lead to premature tire wear and even tire failure, while over-inflation can make the ride uncomfortable and increase the risk of punctures.
- Check your tire pressure regularly, ideally before every ride. The recommended tire pressure is usually printed on the tire sidewall or in your bike’s owner’s manual.
- Use a reliable tire pressure gauge to check your tire pressure.
- Inflate or deflate your tires as needed to reach the recommended pressure.
Remember that tire pressure can fluctuate due to temperature changes, so it’s important to check it frequently, especially during extreme weather conditions.
Using Tire Sealant
Tire sealant is a liquid that can be injected into a tire to prevent air loss from punctures. It works by sealing up small holes and tears in the inner tube or tire itself.
- Tire sealant is particularly effective for preventing air loss from small punctures that might not be immediately noticeable.
- It can also help to prevent punctures from occurring in the first place by sealing up small cuts and abrasions in the tire.
- However, tire sealant is not a substitute for patching a puncture. If you have a large puncture, you will still need to patch it.
There are many different types of tire sealant available on the market. It’s important to choose a sealant that is compatible with your tires and riding conditions.
Types of Tires: Why Do Bike Tires Lose Air
The air retention properties of bicycle tires can vary significantly depending on the type of tire used. Understanding these differences is crucial for selecting the right tires for your needs and minimizing air loss.
Clincher Tires
Clincher tires are the most common type of bicycle tire, characterized by a bead that sits on the rim’s edge and is held in place by the tire’s pressure. They are typically more affordable and readily available than other tire types.
Air Retention Properties
Clincher tires generally have good air retention, but they can be susceptible to air loss due to factors such as:
- Bead wear: Over time, the bead can become worn or damaged, leading to air leaks. This is particularly common in tires that are frequently used on rough terrain.
- Rim compatibility: The fit between the tire bead and the rim is crucial for maintaining air pressure. If the rim is too narrow or the tire bead is too wide, it can lead to poor sealing and air loss.
- Punctures: Punctures are a common cause of air loss in all tire types, but clincher tires are particularly vulnerable due to their relatively thin construction.
Advantages and Disadvantages
- Advantages:
- Widely available and affordable
- Easy to install and remove
- Good air retention when properly maintained
- Disadvantages:
- Susceptible to punctures
- Can be heavier than other tire types
- Bead wear can lead to air loss
Tubular Tires
Tubular tires are a more traditional type of tire, featuring a seamless, tube-like construction that is glued to the rim. They are known for their lightweight and high-performance characteristics.
Air Retention Properties
Tubular tires generally have excellent air retention, as they are not prone to bead wear or rim compatibility issues. However, they can be more susceptible to punctures due to their thinner construction.
Advantages and Disadvantages
- Advantages:
- Lightweight and high-performance
- Excellent air retention
- Smooth ride quality
- Disadvantages:
- More expensive than clincher tires
- More difficult to install and remove
- More susceptible to punctures
Tubeless Tires, Why do bike tires lose air
Tubeless tires are becoming increasingly popular, offering a unique combination of puncture resistance and low rolling resistance. They feature a tight seal between the tire and the rim, eliminating the need for a separate inner tube.
Air Retention Properties
Tubeless tires generally have excellent air retention, as they are not susceptible to bead wear or rim compatibility issues. The tight seal between the tire and the rim helps to prevent air loss. However, tubeless tires can be more difficult to set up initially, and they may require a sealant to prevent punctures.
Advantages and Disadvantages
- Advantages:
- Excellent puncture resistance
- Low rolling resistance
- Good air retention
- Disadvantages:
- More expensive than clincher tires
- Can be more difficult to set up
- May require sealant to prevent punctures
Tire Construction
The construction of a tire plays a significant role in its air retention properties. Here are some key aspects to consider:
- Bead: The bead is the part of the tire that sits on the rim. A well-constructed bead will provide a tight seal and minimize air loss.
- Casing: The casing is the main body of the tire. A strong and durable casing will help to prevent punctures and maintain air pressure.
- Tread: The tread pattern can affect air retention by influencing the tire’s ability to hold air pressure. Tires with a deeper tread pattern may be more prone to air loss due to the increased surface area exposed to the environment.
Choosing Tires Based on Air Retention
When choosing tires based on desired air retention characteristics, consider the following factors:
- Riding style: If you ride on rough terrain, consider tires with a strong bead and durable casing to minimize air loss.
- Frequency of use: Tires that are used frequently may require more attention to air pressure maintenance.
- Budget: Tubeless tires offer excellent air retention but are more expensive than clincher tires.
- Personal preferences: Some riders prefer the feel and performance of tubular tires, while others prefer the convenience and affordability of clincher tires.
So, the next time you find yourself with a flat tire, don’t despair! By understanding the causes of air loss, you can equip yourself with the knowledge to prevent it, identify the culprit, and get back on the road in no time. From regular tire maintenance to choosing the right tire type, a little preventive care can go a long way in ensuring your rides are filled with joy, not frustration.
Detailed FAQs
What is the best way to check for leaks in my bike tire?
You can use a soapy water solution to check for leaks. Simply mix a few drops of dish soap with water and apply it to the tire and valve stem. If bubbles appear, it indicates a leak.
How often should I check my tire pressure?
It’s best to check your tire pressure before every ride, especially if you haven’t ridden in a while. You can also check it after a long ride or if you’ve been riding in extreme temperatures.
Can I use a car tire pump to inflate my bike tire?
Yes, but be careful not to overinflate your bike tire. The maximum pressure for your bike tire is usually listed on the tire sidewall.
How long does it take for a bike tire to lose air naturally?
The rate of natural air loss varies depending on the tire type, material, and environmental factors. However, most bike tires will lose a small amount of air over time, even without a puncture.