How to repair small engines is a crucial skill for anyone who owns lawnmowers, string trimmers, or other small power equipment. Proper maintenance and repair can save you money and frustration, extending the lifespan of your tools and preventing costly breakdowns. This guide dives deep into the essential steps for troubleshooting and repairing these vital machines.
From basic troubleshooting to advanced repair techniques, this comprehensive guide equips you with the knowledge and skills to tackle any small engine problem. We’ll cover everything from essential tools and safety precautions to diagnosing issues, replacing parts, and maintaining your equipment for optimal performance.
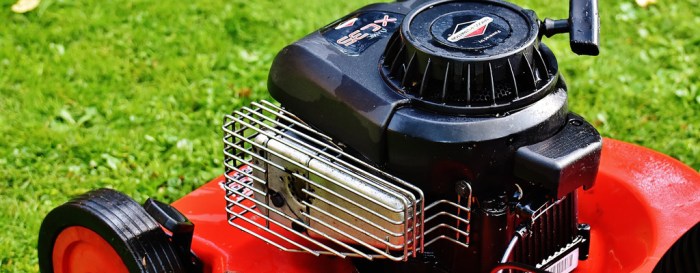
Introduction to Small Engine Repair
Small engines power a vast array of tools and equipment essential to modern life. From the familiar whir of a lawnmower to the buzzing of a string trimmer, these compact powerhouses are found in countless applications. These engines, though seemingly simple, require careful maintenance and understanding to function optimally. Proper repair can extend their lifespan significantly, preventing costly replacements and environmental impact.Understanding the fundamentals of small engine repair empowers you to troubleshoot issues, perform basic maintenance, and ultimately prolong the life of your equipment.
This knowledge translates into significant savings and a more environmentally conscious approach to tool ownership.
Types of Small Engines and Their Common Applications
Small engines encompass a diverse range of designs, each tailored to specific tasks. Lawn mowers, string trimmers, leaf blowers, and generators are just a few examples of the variety. Understanding the specific design features of each type is crucial for effective maintenance and repair. Their differing components and operational principles require distinct approaches to repair.
Importance of Proper Maintenance
Regular maintenance is critical for small engines. It prevents premature wear, reduces the likelihood of breakdowns, and ensures optimal performance. Addressing minor issues promptly can prevent escalation into major problems, saving time and money. Preventative maintenance, such as regular oil changes and air filter replacements, is key to a long and reliable lifespan of your equipment.
Common Reasons for Small Engine Repair
Small engines can fail for a variety of reasons. Fuel delivery problems, ignition system malfunctions, and air filter blockages are common causes of engine issues. Over time, wear and tear on components, such as the carburetor or spark plug, can lead to performance degradation. Poor maintenance practices and improper storage are also significant contributors to engine failure.
Troubleshooting Table
| Engine Type | Common Problems | Symptoms | Potential Solutions |
|---|---|---|---|
| Lawn Mowers | Carburetor Malfunction, Spark Plug Issues, Blade Problems | Irregular running, sputtering, poor acceleration, stalling, loud noises | Inspect and clean the carburetor, replace spark plugs, sharpen or replace blades. |
| String Trimmers | Fuel Line Leaks, Air Filter Clogging, Motor Problems | Weak cutting power, engine stalling, unusual noises, overheating | Inspect and repair fuel lines, replace air filters, check motor for damage. |
| Leaf Blowers | Electrical Malfunctions, Air Filter Clogging, Damaged Impeller | Weak air flow, erratic operation, motor overheating | Check electrical connections, replace air filter, repair or replace impeller. |
| Generators | Fuel Delivery Problems, Wiring Issues, Overheating | Irregular or weak power output, electrical sparking, engine overheating | Inspect and repair fuel lines, check wiring for damage, ensure proper ventilation. |
Tools and Equipment Needed: How To Repair Small Engines
Getting started with small engine repair requires a well-equipped workshop. Having the right tools not only ensures efficient work but also significantly contributes to safety. The following section details the essential tools and equipment needed for a comprehensive approach to small engine repair.
Essential Tools for Small Engine Repair
A well-stocked toolbox for small engine repair is crucial for success. Different types of tools and their appropriate sizes are necessary for various tasks. Careful selection and organization are paramount for efficiency and safety.
| Tool Name | Description | Use Case | Image Description |
|---|---|---|---|
| Adjustable Wrench | A wrench with adjustable jaws for gripping various bolt sizes. | Tightening and loosening nuts and bolts on engine components. | A wrench with a movable jaw is shown, capable of adjusting to different bolt sizes. |
| Socket Set | A set of sockets and a ratchet handle for accessing fasteners in tight spaces. | Removing and installing bolts, nuts, and other fasteners. | A set of various-sized sockets with a ratchet handle and a socket wrench is shown, showcasing different shapes and sizes. |
| Screwdrivers (Phillips and Flathead) | Tools for driving and removing screws with different head types. | Removing and installing screws used in various engine components. | A Phillips and a flathead screwdriver are displayed, illustrating their distinct head shapes. |
| Pliers (Needle-nose, Slip-joint) | Pliers for gripping small parts and wires. | Handling small parts, wires, and removing damaged components. | Two types of pliers are depicted: needle-nose pliers for precision gripping and slip-joint pliers for general use. |
| Torque Wrench | A wrench that measures and controls the tightening torque of fasteners. | Ensuring fasteners are tightened to the correct torque specifications, preventing damage to components. | A wrench with a dial for measuring torque is shown, with an arrow indicating the torque setting. |
| Drain Pan | A pan for collecting fluids during servicing. | Collecting oil, coolant, and other fluids during servicing procedures. | A rectangular metal pan with a slightly sloped bottom is displayed, ready for collecting fluids. |
| Air Compressor | A tool for supplying compressed air for cleaning and blowing off debris. | Cleaning engine parts and blowing off excess dirt and debris. | A small air compressor with a hose and nozzle is shown, highlighting the connection points for efficient use. |
| Engine Hoist | A hoist designed for lifting and supporting small engines for servicing. | Lifting and supporting small engines for easy access to various components. | A small engine hoist with a hook for lifting is depicted, and a small engine is shown being lifted by the hoist. |
Safety Precautions When Using Tools and Equipment
Proper safety precautions are crucial when working with small engines and their associated tools. Ignoring safety measures can lead to injuries or equipment damage. Always prioritize safety above all else.
- Always wear safety glasses to protect your eyes from flying debris.
- Use gloves to protect your hands from cuts, abrasions, and chemical exposure.
- Ensure proper ventilation when working with chemicals or solvents.
- Use appropriate personal protective equipment (PPE) for tasks that involve potential hazards.
- Never operate power tools without appropriate safety guards in place.
- Disconnect the spark plug wire to prevent accidental starting during repair.
- Always work in a well-lit and organized workspace to avoid accidents.
- Store tools and equipment properly to prevent accidents and damage.
Basic Troubleshooting Steps

Source: mobilesmallenginemaster.com
Troubleshooting a small engine involves a systematic approach, starting with a thorough visual inspection. Understanding the engine’s normal operation and identifying potential problems through observation and listening is crucial. This allows you to pinpoint the source of the issue quickly and efficiently, saving time and money. A methodical approach will help you isolate the problem and avoid unnecessary repairs.
Initial Steps for Diagnosing a Problem
Initial diagnosis begins with understanding the engine’s normal operation. Observe the engine’s appearance for any unusual signs. Look for leaks, loose connections, or damage to components like the fuel lines, air filter, and spark plugs. Listen for unusual noises or vibrations. A systematic check of the engine’s function will allow you to isolate the problem area.
Inspecting Engine Components
Thorough visual inspection is vital. Start by examining the air filter for cleanliness. A clogged filter restricts airflow, leading to poor performance. Check the spark plugs for proper condition. Damaged or fouled spark plugs can disrupt the ignition process.
Inspect the fuel lines for leaks or damage, and ensure the fuel filter is clean. A clogged fuel filter reduces fuel flow, impacting engine performance. Pay close attention to the oil level and condition. Low or dirty oil can indicate a problem. Inspect the belts and pulleys for wear or damage.
Damaged belts can result in engine misfiring or failure. Finally, check the engine mounts for any signs of damage or misalignment. Damaged engine mounts can cause vibrations and noise issues.
Identifying Potential Issues Through Visual Inspection and Listening
Visual inspection provides a first look at the engine’s condition. Look for any obvious signs of damage, leaks, or loose connections. Listen for unusual noises, such as knocking, grinding, or hissing. These sounds can indicate mechanical problems. A systematic examination can reveal potential issues that are not immediately obvious.
A combination of visual and auditory cues can often lead to quick problem identification.
Troubleshooting Table
| Symptom | Potential Cause | Procedure to Check | Expected Result |
|---|---|---|---|
| Engine won’t start | Weak spark, fuel delivery problem, or compression issue | Check spark plug condition, fuel lines for leaks, and compression | Spark plug should have a good spark, fuel should flow freely, and compression should be within the expected range |
| Engine runs rough | Clogged air filter, fuel mixture problem, or ignition timing issue | Check air filter for clogs, adjust fuel mixture, and check ignition timing | Air filter should be clean, fuel mixture should be correct, and ignition timing should be precise |
| Engine stalls | Fuel delivery problem, low oil, or electrical issues | Check fuel lines for leaks, check oil level, and inspect electrical connections | Fuel should flow consistently, oil level should be appropriate, and electrical connections should be secure |
| Engine overheats | Insufficient coolant, faulty radiator, or blocked cooling passages | Check coolant level, inspect radiator for leaks or clogs, and examine cooling passages | Coolant level should be adequate, radiator should be leak-free, and cooling passages should be unobstructed |
Common Repair Procedures
Mastering small engine repair involves understanding and executing common procedures. These procedures, from replacing spark plugs to addressing fuel system issues, are crucial for maintaining optimal performance and longevity. Proper technique ensures efficient operation and minimizes potential damage.
Spark Plug Replacement
Replacing spark plugs is a fundamental maintenance task. A faulty spark plug can lead to engine misfires, reduced power, and ultimately, engine failure. Regular replacement, according to the manufacturer’s recommendations, is vital.
| Step | Description | Tools Needed | Image Description |
|---|---|---|---|
| 1 | Gather necessary tools: spark plug socket, wrench, and a new spark plug. | Spark plug socket, wrench, new spark plug | A hand or power tool set, including a spark plug socket and wrench, alongside a new spark plug. The new spark plug should be visually inspected for any signs of damage. |
| 2 | Warm up the engine to allow for easier removal. | None | The engine’s heat expands components, making removal easier. This reduces the risk of damaging parts during removal. |
| 3 | Disconnect the spark plug wire. | Spark plug wire wrench | A spark plug wire wrench is used to carefully detach the spark plug wire from the spark plug cap. |
| 4 | Remove the old spark plug using the spark plug socket. | Spark plug socket | The spark plug socket is carefully positioned over the spark plug, and the spark plug is rotated counterclockwise to remove it. |
| 5 | Inspect the old spark plug and compare it to the new one to identify wear and tear. | Visual inspection | Inspect the old spark plug for signs of damage or wear. Check the electrode gap and overall condition. |
| 6 | Install the new spark plug by hand, then tighten it with the wrench. | Spark plug socket, wrench | Hand-tighten the new spark plug, followed by tightening with the wrench to the manufacturer’s specified torque. |
| 7 | Reconnect the spark plug wire. | Spark plug wire | Carefully reconnect the spark plug wire to the spark plug cap, ensuring a secure connection. |
Air Filter Replacement
Regular air filter replacement is crucial for maintaining proper engine performance and preventing premature engine wear. A clogged air filter restricts airflow, impacting fuel efficiency and power output.
| Step | Description | Tools Needed | Image Description |
|---|---|---|---|
| 1 | Locate the air filter housing and identify the filter. | None | Locate the air filter housing and the filter element. |
| 2 | Remove the air filter housing cover. | Appropriate wrench or tool | Remove the air filter housing cover, using the appropriate tool, ensuring proper handling to avoid damage. |
| 3 | Carefully remove the old air filter. | None | Remove the old air filter by hand, checking for debris or damage. |
| 4 | Inspect the old filter and compare to the new filter. | Visual inspection | Inspect the old filter for any signs of excessive dirt or damage. |
| 5 | Install the new air filter, ensuring proper seating. | None | Carefully install the new air filter into the housing, ensuring it sits snugly in the air filter housing. |
| 6 | Replace the air filter housing cover. | Appropriate wrench or tool | Replace the air filter housing cover, tightening it securely to prevent air leaks. |
Fuel Filter Replacement
Replacing fuel filters is important for maintaining a clean fuel supply to the engine. A clogged fuel filter can lead to poor engine performance, starting problems, and reduced fuel efficiency.
| Step | Description | Tools Needed | Image Description |
|---|---|---|---|
| 1 | Locate the fuel filter housing and identify the filter. | None | Locate the fuel filter housing and the fuel filter. |
| 2 | Turn off the fuel supply and allow the fuel to drain. | Appropriate tool for turning off fuel supply | Turn off the fuel supply to the engine, allowing fuel to drain from the fuel system. |
| 3 | Disconnect the fuel filter lines. | Appropriate wrench or tool | Carefully disconnect the fuel filter lines from the fuel filter. |
| 4 | Remove the old fuel filter. | None | Remove the old fuel filter from its housing. |
| 5 | Install the new fuel filter. | None | Install the new fuel filter in the fuel filter housing. |
| 6 | Reconnect the fuel filter lines. | Appropriate wrench or tool | Reconnect the fuel filter lines to the fuel filter. |
| 7 | Turn the fuel supply back on and check for leaks. | Appropriate tool for turning on fuel supply | Turn the fuel supply back on and check for leaks around the fuel filter and connections. |
Fuel System Troubleshooting and Repair
The fuel system is the lifeblood of any small engine. Proper functioning ensures consistent power output and reliable operation. Understanding the fuel system’s components and common problems is crucial for efficient repair and maintenance. Diagnosing and rectifying issues quickly minimizes downtime and maximizes engine lifespan.The fuel system in small engines typically involves a fuel tank, fuel lines, a fuel pump (if present), and a carburetor.
The carburetor mixes fuel with air, and the proper fuel-air mixture is essential for combustion. Problems in any of these components can lead to poor performance, stalling, or complete engine failure.
Fuel System Components and Function
The fuel system delivers fuel from the storage tank to the carburetor where it mixes with air before entering the engine. A fuel filter, if present, removes impurities from the fuel. The fuel pump (if present) pressurizes the fuel to ensure a consistent flow. The carburetor precisely mixes fuel with air, creating the proper air-fuel ratio for efficient combustion.
Common Fuel System Problems and Causes
Fuel system problems are frequently related to fuel delivery, mixing, or blockage. Clogged fuel filters restrict fuel flow, leading to poor engine performance. Damaged or clogged fuel lines prevent fuel from reaching the carburetor. A malfunctioning fuel pump, if present, results in inconsistent fuel pressure. A dirty or improperly adjusted carburetor leads to improper fuel-air mixture, impacting engine performance.
Cleaning and Repairing Fuel Lines
Fuel lines, often made of flexible plastic or rubber, can become brittle, cracked, or clogged with fuel deposits. Cleaning involves removing the fuel line from the system, thoroughly cleaning it with a solvent like gasoline or specialized fuel line cleaner. Damaged or severely deteriorated lines must be replaced with new ones of the correct type and size. Ensure connections are secure to prevent leaks.
Cleaning and Repairing Carburetors
Carburetors are complex components that require careful cleaning and adjustment. Common problems include clogged jets, dirty air filters, and improper adjustments. Thorough cleaning involves disassembling the carburetor, removing fuel deposits, and inspecting for damage. Proper reassembly and adjustment are crucial to restore the carburetor’s function.
Fuel Type Considerations for Small Engines
| Fuel Type | Characteristics | Suitability for Small Engines | Advantages | Disadvantages |
|---|---|---|---|---|
| Regular Gasoline | Standard fuel readily available at gas stations. | Generally suitable for most small engines. | Widely available and affordable. | May contain impurities that can clog fuel systems over time. |
| Premium Gasoline | Higher octane rating than regular gasoline. | Often recommended for engines requiring higher performance. | Provides better combustion and reduced engine knocking. | Generally more expensive than regular gasoline. |
| Unleaded Gasoline | Common type of gasoline, without lead. | Suitable for most modern small engines. | Environmentally friendly. | May contain additives that can affect fuel system components over time. |
| Ethanol-blended Gasoline | Contains ethanol as an additive. | Suitable for most small engines but may require specific fuel system components. | Renewable fuel source. | Can affect fuel system components over time and requires more frequent maintenance for some applications. |
The table above provides a comparative overview of different fuel types suitable for small engines. Consider the specific engine model and its manufacturer’s recommendations when selecting fuel.
Ignition System Troubleshooting and Repair
The ignition system is the heart of any small engine, responsible for converting electrical energy into the spark needed to ignite the fuel-air mixture. Proper functioning is crucial for starting and running the engine smoothly. A malfunctioning ignition system can lead to difficult starts, sputtering, or complete engine failure. Understanding the system and how to troubleshoot common issues is essential for any small engine owner.Ignition systems in small engines use a spark plug, coil, wire, and distributor to deliver a high-voltage spark to the spark plug.
Malfunctions in any of these components can cause a variety of issues. Diagnosing the problem is often a systematic process, and this guide will provide a step-by-step approach to identifying and resolving ignition system problems.
Ignition System Function
The ignition system’s core function is to generate and deliver a high-voltage spark to the spark plug at the precise moment the air-fuel mixture is compressed in the cylinder. This spark ignites the mixture, creating the combustion that powers the engine. The system consists of various interconnected components, each playing a vital role in the overall process.
Inspecting and Repairing Ignition Components
Proper inspection of ignition components is essential for pinpointing the source of any malfunction. This involves visual checks for damage, such as frayed wires, broken insulation, or cracked spark plug boots. Look for signs of overheating or corrosion on the coil. A compromised coil may exhibit a weak or erratic spark. Also, check for proper wire connections and tighten loose connections to ensure a reliable electrical path.
Replacing damaged components is often necessary to restore optimal performance.
Signs of a Faulty Ignition System
Several indicators can signal a problem with the ignition system. These include difficult starting, sputtering or misfiring, engine running erratically, or complete engine failure. The engine might not start at all, or it might run for a few seconds and then stall. Additionally, you might notice a clicking sound, which could indicate a problem with the ignition coil.
If the spark plug is excessively wet, or the wires are corroded, that also points towards an ignition system issue.
Testing Ignition Components with a Multimeter
Using a multimeter to test the ignition components is a crucial step in troubleshooting. This involves checking the resistance of the coil, the continuity of the wires, and the spark output of the spark plug. A multimeter is essential for accurate measurements.
- Coil Resistance Test: Measure the resistance between the coil’s primary and secondary windings according to the manufacturer’s specifications. Deviations from the expected values indicate a potential coil malfunction. For example, if the resistance is significantly higher than expected, it may be necessary to replace the coil. Typical values vary by model and should be found in the owner’s manual.
- Wire Continuity Test: Verify the continuity of the ignition wires. A multimeter can help determine if any breaks or shorts exist in the wiring. A break in the wire will prevent current from reaching the spark plug, resulting in no spark. Continuity tests ensure the electrical path is complete.
- Spark Plug Testing: Assess the spark plug’s output. Ensure proper spark plug gap and visually inspect for signs of damage. The presence of a healthy spark is crucial for proper engine operation. A lack of spark indicates a problem within the ignition system.
Maintenance Tips for Preventing Repairs

Source: icpl.org
Proactive maintenance is key to extending the lifespan of your small engine and minimizing costly repairs down the road. Regular upkeep not only prevents major failures but also ensures optimal performance and fuel efficiency. By following a consistent maintenance schedule, you can significantly reduce the likelihood of costly breakdowns and keep your equipment running smoothly.
Importance of Regular Maintenance
Regular maintenance is crucial for the longevity and efficiency of small engines. Ignoring routine checks and servicing can lead to premature wear and tear, escalating repair costs, and ultimately, the need for a complete engine overhaul or replacement. Consistent upkeep keeps the engine components operating within their optimal tolerances, reducing friction, preventing overheating, and ensuring proper lubrication.
Routine Maintenance Checklist
A well-defined routine maintenance schedule is essential to preventing problems. Following a consistent checklist helps catch potential issues early, before they escalate into major repairs. This structured approach ensures that all critical components receive the necessary attention, maximizing the engine’s operational lifespan and performance.
- Air Filter Inspection and Replacement: Regularly inspect the air filter for dirt and debris buildup. Replace the filter when it becomes clogged, as a dirty air filter restricts airflow, leading to reduced power output and engine overheating. A clean air filter ensures efficient combustion and prevents engine damage.
- Fuel System Inspection: Check the fuel lines and fuel filter for any signs of damage or leaks. A clogged fuel filter can restrict fuel flow, causing the engine to sputter or stall. Ensure fuel lines are free of cracks or kinks. Clean or replace the fuel filter as needed.
- Lubrication: Regular lubrication is vital for all moving parts. Follow the manufacturer’s recommendations for oil type and frequency of changes. Using the correct viscosity oil and performing timely oil changes is essential for preventing wear and tear and maintaining optimal engine performance.
- Spark Plug Inspection: Examine the spark plug for fouling, damage, or wear. Replace the spark plug if necessary, as a faulty spark plug can cause misfiring and poor engine performance.
- Coolant Check and Top-Off (if applicable): Inspect the coolant level and ensure it is within the recommended range. If the coolant level is low, top it off with the correct type of coolant to maintain proper engine temperature.
- Belt Inspection and Tensioning: Inspect drive belts for cracks, wear, or slippage. Adjust or replace as necessary, as worn belts can lead to reduced power and potentially cause further damage. Proper tension ensures smooth operation and prevents damage.
Lubricating and Adjusting Engine Parts
Proper lubrication and adjustment of engine components are critical for minimizing friction and ensuring smooth operation. Consistent lubrication reduces wear and tear, extending the engine’s lifespan. Adjustments ensure optimal performance and prevent premature failure.
- Engine Oil Changes: Use the correct oil type and change it according to the manufacturer’s specifications. Over time, oil breaks down and loses its lubricating properties. Replacing it regularly ensures optimal lubrication and reduces wear on internal engine components.
- Chain Lubrication: If the engine uses a chain drive, lubricate the chain regularly to prevent wear and ensure smooth operation. Using the correct lubricant prevents friction and ensures proper functioning of the chain.
- Adjusting Valves (if applicable): Valve adjustments ensure proper clearance between the valves and the engine components. If the valve clearance is incorrect, the engine may not function efficiently or at all. Proper adjustment maintains optimal engine performance.
Storage and Winterization, How to repair small engines
Proper storage and winterization are crucial for preserving your small engine during periods of inactivity. This protects against corrosion, damage from extreme temperatures, and the formation of harmful condensation.
- Storage Procedures: Store the engine in a clean, dry environment to prevent corrosion and damage. Remove any excess fuel and drain the fuel tank. Lubricate all moving parts with the correct lubricants. Proper storage procedures are essential for preserving the engine’s components and preventing premature wear.
- Winterization Procedures: For winter storage, follow the manufacturer’s recommendations for winterization procedures. These procedures often involve draining fluids, adding antifreeze to coolant systems (if applicable), and preventing condensation buildup. Winterizing your small engine protects it from damage from extreme cold.
Advanced Repair Techniques (Optional)
Stepping beyond basic repairs, advanced techniques often require a deeper understanding of the engine’s internal components and meticulous procedures. These procedures, while potentially more complex, unlock the ability to fully restore and optimize the performance of small engines. Careful attention to detail and precise execution are paramount for successful results.Engine rebuilds and valve adjustments are examples of advanced techniques.
They may seem daunting, but with the right tools, knowledge, and methodical approach, they become achievable tasks. Understanding the specific intricacies of each technique is key to successful completion.
Valve Adjustments
Proper valve clearance is critical for optimal engine performance. Incorrect clearance can lead to engine knocking, reduced power, and eventual engine damage. Adjusting valve clearances involves precisely measuring and setting the gap between the valves and their respective components.
- Tools and Equipment: Valve adjustment tools are specialized, often including dial indicators, feeler gauges, and torque wrenches. Specific tools are tailored for different engine types, so precise identification is necessary.
- Procedure: This typically involves disassembling parts of the engine’s cylinder head, carefully measuring valve clearances, and then adjusting them with shims or other components. Detailed instructions should be consulted from the engine’s manufacturer’s manual or a reputable repair manual.
- Troubleshooting: Inaccurate adjustments can lead to valve damage. Always double-check measurements and ensure proper tightening of fasteners. The use of a dial indicator is crucial for precision in determining the correct clearance.
Engine Rebuilds
An engine rebuild involves completely disassembling and reassembling an engine, often due to significant wear or damage. This process can be time-consuming and demanding, requiring a strong understanding of engine mechanics.
- Tools and Equipment: Engine rebuilds require a wide range of specialized tools, including engine stands, cylinder honing tools, crankshaft bearings, piston rings, and gaskets. Proper selection and use of tools are essential to prevent further damage during the process.
- Procedure: The process typically involves completely disassembling the engine, cleaning and inspecting each part, replacing worn components, and meticulously reassembling the engine. Accurate part replacement and proper torque are critical steps. A detailed engine diagram or a reputable repair manual will aid in this process.
- Troubleshooting: Carefully examining each component for damage or wear is crucial. Improper reassembly can lead to performance issues. Detailed inspection and correct reassembly procedures are essential.
Comparison of Small Engine Repair Manuals
| Feature | Manufacturer Manual | Repair Manual (Generic) | Repair Manual (Specific Engine Type) ||—|—|—|—|| Accuracy | High, manufacturer-specific | Varies; may need cross-referencing | High, targeted to specific engine type || Detail | Varies, some models may be less detailed | Varies, depends on the manual’s quality | Usually more comprehensive || Illustrations | Often excellent, clear diagrams | Varies, some have detailed illustrations | Usually contains detailed diagrams and schematics || Cost | Often included with purchase, but may not cover advanced techniques | Typically more affordable | Might cost more than generic manuals but less than manufacturer-specific || Availability | Dependent on the manufacturer and model | Widely available online and in bookstores | Varies depending on the specific engine type |
Last Point
Source: evoclearning.com
In conclusion, repairing small engines can seem daunting, but with the right knowledge and tools, it’s achievable. This guide provides a thorough roadmap for tackling common issues and extending the life of your equipment. Remember to prioritize safety and follow the instructions carefully for successful repairs. By understanding the intricacies of your small engines, you’ll gain the confidence to handle any repair task that comes your way.
FAQ Overview
What are the most common causes of small engine sputtering?
Sputtering can be caused by a clogged air filter, low fuel pressure, or a faulty spark plug. Check these components first.
How often should I change the oil in my small engine?
Oil changes should be performed every 50 hours of use, or more frequently if the operating conditions are severe.
What are the signs of a worn-out fuel pump?
A weak or failing fuel pump will cause inconsistent engine speed or complete engine stalling.
What safety precautions should I take when working on a small engine?
Always disconnect the spark plug wire and ensure the engine is completely cool before working on it. Wear appropriate safety glasses and gloves.


